When it comes to potluck royalty, nothing commands the room quite like a perfectly executed Layered pasta salad. This isn’t just a side dish; it is a structural masterpiece that balances vibrant colors with a symphony of textures.
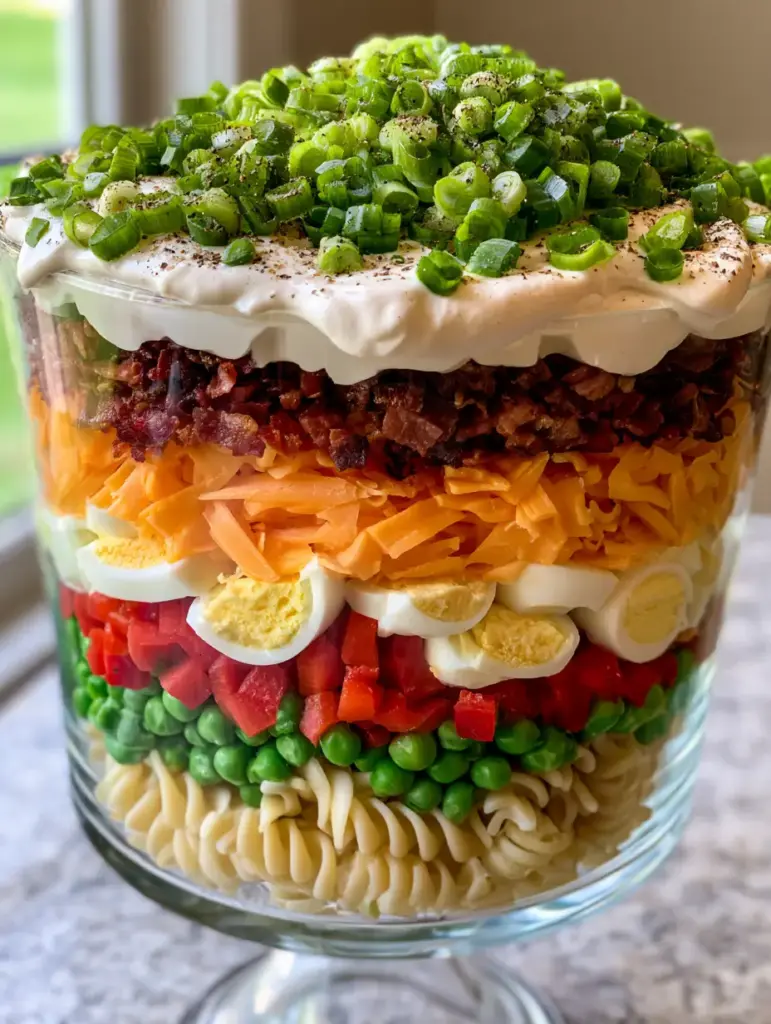
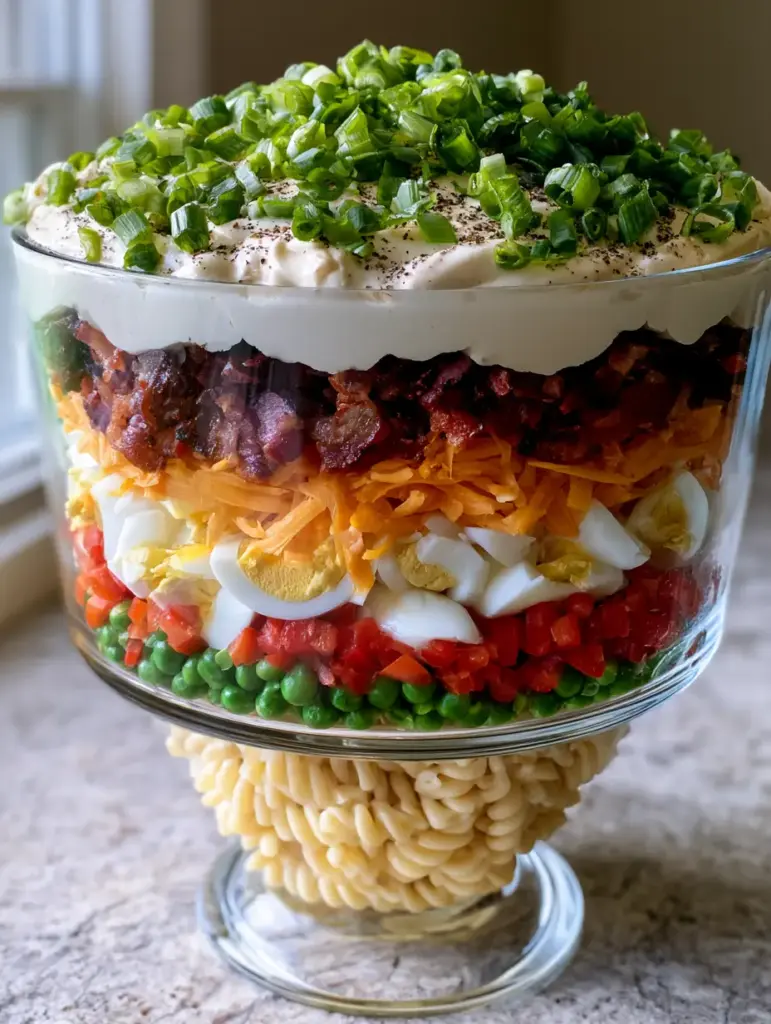
The beauty of this recipe lies in its architectural integrity, showcasing a stunning cross-section of ingredients through a clear glass bowl. Each layer is meticulously chosen to provide a specific mouthfeel, from the snappy peas to the velvety mayonnaise-based dressing.
Whether you are hosting a summer barbecue or looking for a meal-prep solution that won’t get soggy, this Layered pasta salad delivers. By separating the dressing from the more delicate vegetables, we ensure every bite remains as crisp as the moment it was assembled.
Why This Architectural Salad Wins Every Single Time
- Structural Integrity: Using firm rotini creates a stable foundation that prevents the upper layers from sinking into the base.
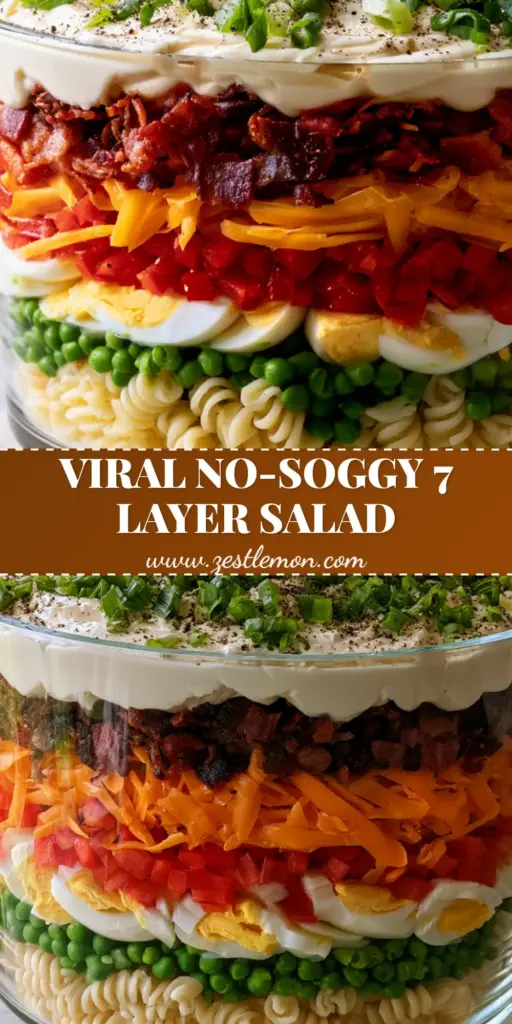
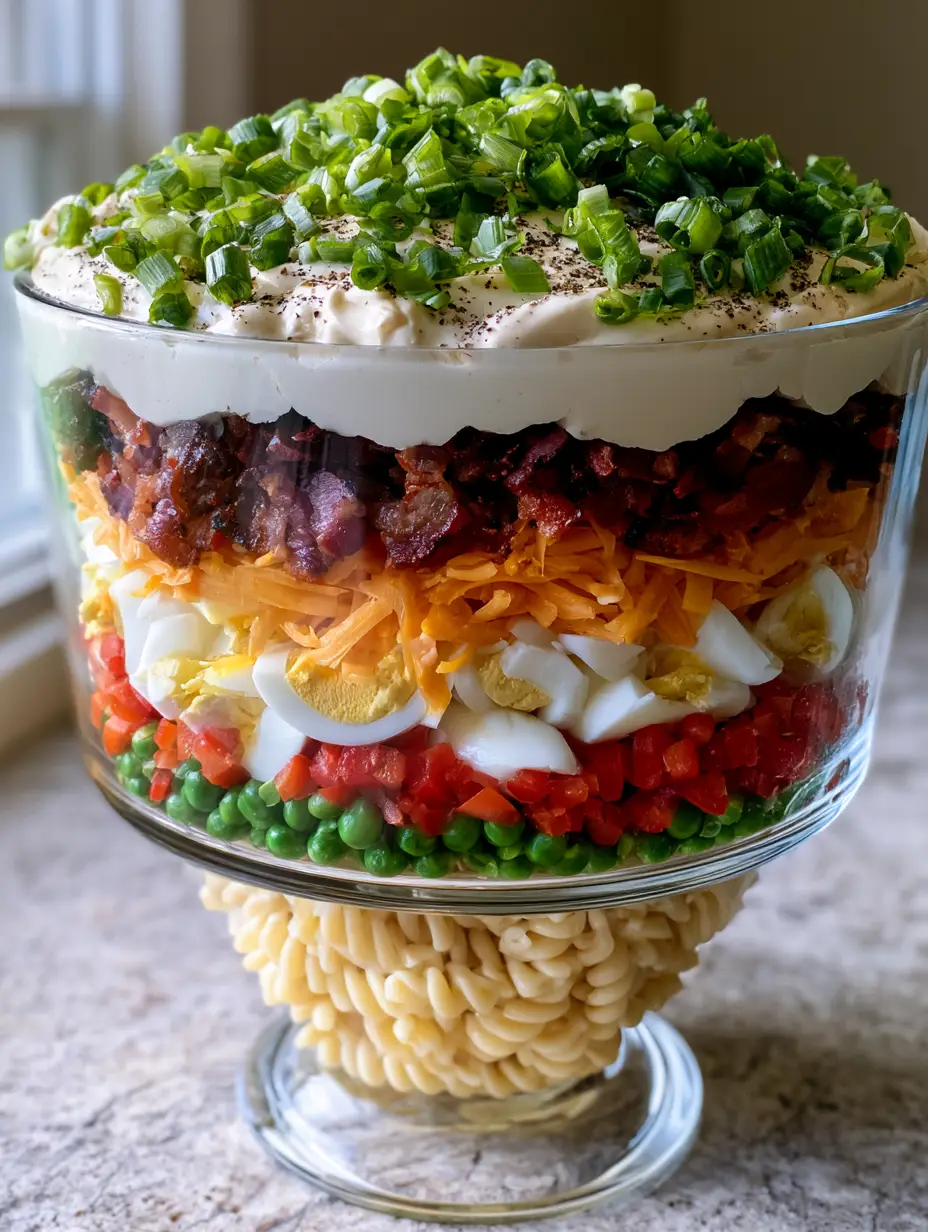
- Visual Brilliance: The contrast between the bright green peas, scarlet red peppers, and golden egg yolks creates a “rainbow in a bowl” effect.
- Make-Ahead Magic: Unlike traditional tossed salads, this version actually benefits from sitting, as the flavors meld without losing their individual crunch.
- Textural Contrast: You get the softness of the pasta, the snap of raw peppers, and the crispy shattering of thick-cut bacon in every forkful.
The Essential Layers for a Showstopping Side Dish
1 lb (450g) Rotini Pasta: We choose rotini for its “sauce-catching” spirals, but more importantly, its structural strength when cooked to a perfect al dente state.
2 cups (300g) Frozen Sweet Peas: These provide a burst of sweetness and a vibrant green hue; ensure they are fully thawed and patted dry to avoid excess moisture.
2 large (300g) Red Bell Peppers: Diced into small, uniform cubes, these provide the essential crunch and a necessary pop of bright red color to the third layer.
6 large Hard-Boiled Eggs: Sliced into rounds, these eggs offer a creamy texture and a bright yellow center that acts as the visual focal point of the salad’s mid-section.
2 cups (225g) Shredded Sharp Cheddar: Hand-shredded cheese provides a superior texture and a sharp, salty bite that bridges the gap between the vegetables and the proteins.
1 lb (450g) Thick-Cut Bacon: Fried until dark brown and shattered into crumbles, this provides the smokiness and the “salty-crunch” factor that defines a classic layered salad.
1.5 cups (350ml) High-Quality Mayonnaise: This serves as the base of our thick white dressing, providing a velvety mouthfeel that coats the ingredients without becoming watery.
1/2 cup (120ml) Sour Cream: Added to the dressing for a necessary tang that cuts through the richness of the mayonnaise and cheddar.
1 tbsp (15ml) Apple Cider Vinegar: This “invisible” ingredient provides the acidity needed to brighten the flavors of the heavy dressing.
4-5 Fresh Green Onions: Sliced into thin coins, these provide a mild onion bite and a vibrant green garnish for the very top of the salad.
Freshly Cracked Black Pepper: A heavy dusting on top provides a visual “finished” look and a subtle floral heat that rounds out the creamy dressing.
Tools Required for Professional Layering
To achieve the look of a professional food stylist, you will need a 3-quart (2.8L) clear glass trifle bowl. The vertical walls of a trifle bowl are essential for showing off the distinct horizontal lines of each layer.
A sharp mandoline or a high-quality chef’s knife is required for the red peppers and green onions to ensure uniformity. Uniformity isn’t just for looks; it ensures that every bite has a consistent ratio of ingredients.
Lastly, an offset spatula is the secret tool for spreading the dressing edge-to-edge. This seals the layers below, preventing air from oxidizing the vegetables and keeping the salad fresh for hours.
Mastering the Art of the Perfect 7-Layer Assembly
Phase 1: Precision Cooking the Foundation
Bring a large pot of heavily salted water to a rolling boil. Adding salt at this stage is the only chance you have to season the pasta itself from the inside out.
Cook the rotini for exactly 1 minute less than the package directions suggest. You are looking for a firm al dente texture that will hold up under the weight of the layers above.
Drain the pasta and immediately rinse with cold water to stop the cooking process. Toss with a teaspoon of olive oil to prevent the spirals from sticking together while you prep the other layers.
Phase 2: Achieving the Perfect Sliced Eggs
Place your eggs in a single layer in a saucepan and cover with an inch of water. Bring to a boil, then immediately remove from heat and let sit, covered, for exactly 11 minutes.
Plunge the eggs into an ice bath for at least 10 minutes. This thermal shock prevents the “green ring” from forming around the yolk, ensuring the “bright yellow centers” described in our visual blueprint.
Once cooled, peel carefully and use a sharp, thin-bladed knife or an egg slicer. You want clean, even rounds that will look beautiful pressed against the glass of your bowl.
Phase 3: The Searing and Dicing Stage
Cook your bacon in a cold skillet over medium heat. Starting with a cold pan allows the fat to render out slowly, resulting in a deeper brown color and a crunchier texture.
While the bacon cools, dice your red bell peppers into 1/4 inch (6mm) cubes. Pat them dry with a paper towel to remove any surface moisture, which is the enemy of a crisp layered salad.
Finely slice the green onions, using both the white and the vibrant green parts. Keep these separate, as the green tops will be used for the final decorative flourish.
Phase 4: Constructing the Masterpiece
Start with the rotini at the base, leveling it out with the back of a spoon. Add the peas as the second layer, making sure to push some against the glass for visibility.
Follow with the red bell peppers, then the sliced eggs. For the eggs, place the most attractive slices vertically against the glass, then fill the center with the remaining pieces.
Add the shredded cheddar, followed by the crumbled bacon. The bacon should form a dark, salty barrier before you apply the final thick layer of dressing.
Pro Secrets for Crisp Layers and Bold Flavor
- The “Edge-to-Edge” Seal: When applying the dressing, spread it all the way to the glass. This creates an airtight seal that keeps the vegetables underneath fresh.
- Dry Your Greens: Any moisture on the peas or peppers will eventually sink to the bottom, making the pasta soggy. Use a salad spinner or paper towels liberally.
- Season Every Layer: While the dressing is flavorful, a tiny pinch of salt and pepper on the pea and pepper layers ensures the salad isn’t bland in the middle.
- Chill Time: For the best results, let the salad chill for at least 4 hours. This allows the dressing to slightly set and the flavors to permeate the pasta.
Storage, Freshness, and Make-Ahead Advice
This Layered pasta salad is a champion of longevity. It can be made up to 24 hours in advance, making it the perfect solution for busy hosts or meal-preppers.
Keep the bowl tightly covered with plastic wrap in the refrigerator. If you have leftovers, they will stay fresh for 3-4 days, though the bacon may lose some of its initial “shattering” crunch over time.
We do not recommend freezing this dish. The mayonnaise-based dressing will break and become oily, and the fresh vegetables will lose their structural integrity upon thawing.
What to Pair with Your Layered Masterpiece
This salad is a hearty side that pairs beautifully with grilled proteins. It is a natural companion to smoked brisket, grilled chicken thighs, or even a simple burger.
If you are looking to build out a full spread, consider browsing our complete directory of pasta salad recipes for more inspiration. For those who love the combination of pork and cheese, our savory bacon and broccoli variation is a fantastic alternative.
If you have cheese lovers at your table, you might also enjoy the richness of our creamy cheddar pasta salad or the classic simplicity of a traditional macaroni pasta salad.
Common Questions About Layered Salads
Yes, though short, sturdy shapes like elbow macaroni or farfalle (bowtie) work best. Avoid long noodles like spaghetti, as they lack the structural integrity to support the heavy upper layers.
The key is to cook the rotini al dente and rinse it in cold water immediately. Rinsing removes excess starch and stops the cooking process, ensuring the spirals remain firm under the weight of the other layers.
For peak flavor and visual appeal, assemble the salad 4 to 8 hours before serving. This allows the dressing to set and flavors to meld while keeping the bacon and peppers at their maximum crunch.
Absolutely! You can omit the bacon and add a layer of smoked roasted chickpeas or toasted sunflower seeds to maintain that essential salty crunch and smoky flavor profile.
A thick, mayonnaise-based dressing is essential for the layering technique. It creates an airtight seal over the vegetables, which keeps them crisp and prevents the colors from bleeding into one another.
The Final Recipe: 7-Layer Pasta Salad
Layered Pasta Salad: The Ultimate 7-Layer Trifle Bowl Showstopper
Ingredients
Equipment
Method
- Boil rotini in salted water until al dente. Rinse with cold water and drain thoroughly.
- Hard-boil eggs and slice. Fry bacon until crispy and dark brown, then crumble.
- In a glass trifle bowl, layer ingredients in order: pasta, peas, bell peppers, egg slices, cheese, and bacon.
- Whisk mayo, sour cream, vinegar, and sugar. Spread over the top edge-to-edge. Garnish with green onions and cracked black pepper.
Notes
Chill for at least 4 hours before serving for the best flavor meld.
Closing Thoughts on This Culinary Classic
The Layered pasta salad is more than just a dish; it’s a nostalgic centerpiece that never fails to impress. Its combination of calculated textures and vibrant aesthetics makes it a perennial favorite for a reason.
We hope this guide helps you create a salad that is as beautiful as it is delicious. If you enjoyed this recipe, please leave a comment below and share your results with us!
Don’t forget to follow us on Pinterest for more visually stunning recipe inspiration and kitchen tips!