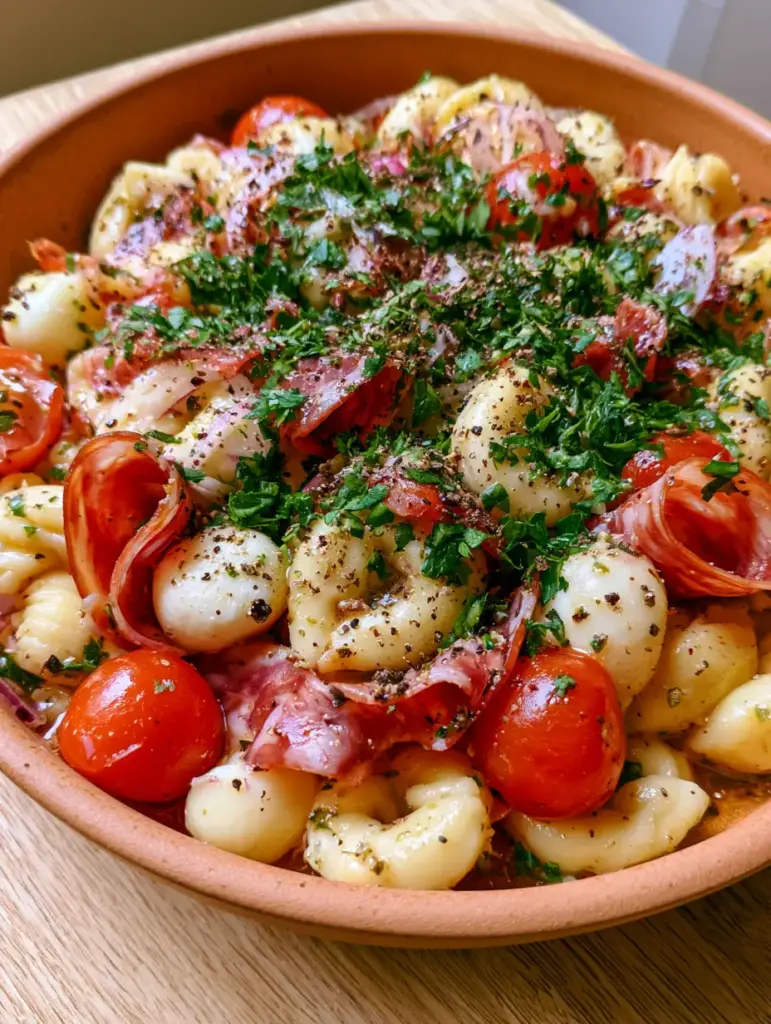
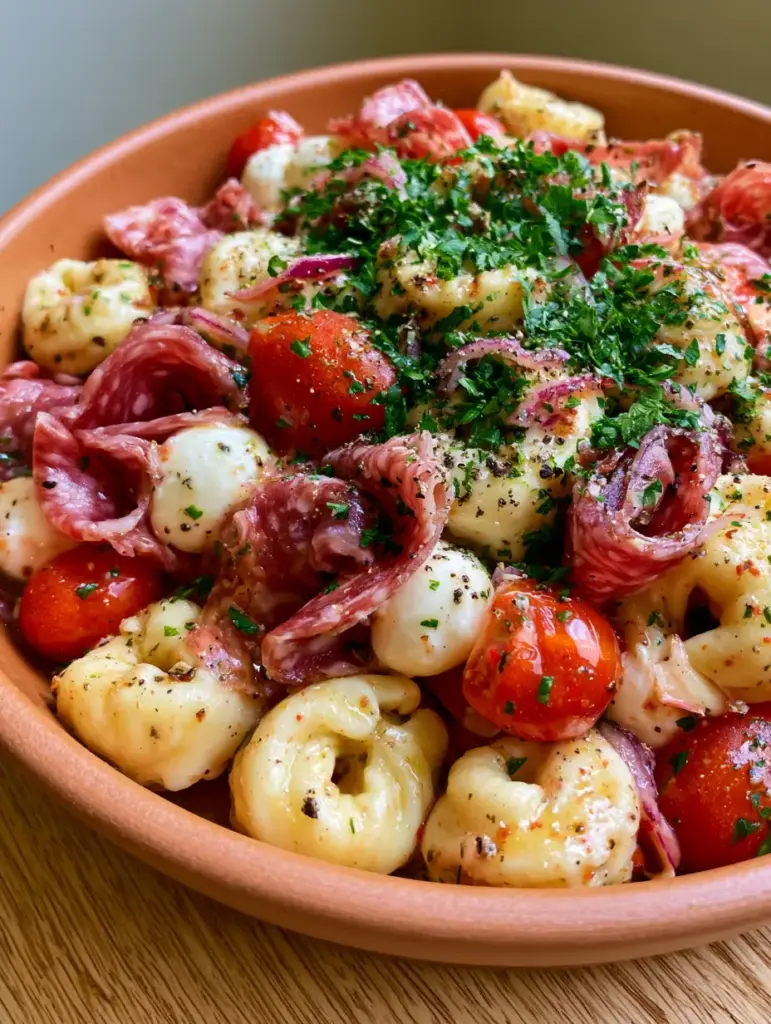
There is a specific visual magic that occurs when a gourmet tortellini salad is executed with professional precision. Imagine a shallow, rustic matte terracotta bowl filled with plump, cheese-stuffed pasta, each piece boasting distinct ridges without a single tear in the delicate dough.
This isn’t your standard deli-counter pasta salad; it is a masterclass in texture and vibrance. From the creamy snow-white mozzarella pearls to the hand-folded ribbons of marbled Genoa salami, every element is designed to catch the soft, directional daylight of a perfect summer afternoon.
In this guide, we are diving deep into the culinary forensics of the perfect tortellini salad. We will ensure your vinaigrette provides a glistening, glossy sheen that coats every ingredient perfectly without ever pooling at the bottom of the bowl.
Why This Gourmet Pasta Salad Works
- Al Dente Precision: We focus on a firm, “toothy” bite for the pasta, ensuring it holds its shape against the weight of the Italian meats and cheeses.
- Visual Texture: The contrast between the taut, vibrant cherry tomato halves and the thin, translucent slivers of red onion creates a high-end restaurant aesthetic.
- Emulsified Glaze: Unlike oily dressings that slide off, our herb vinaigrette acts as a glossy glaze, clinging to the ridges of the tortellini.
- Flavor Balance: The heat of coarse cracked black pepper perfectly offsets the richness of the mozzarella and the saltiness of the Genoa salami.
The Architectural Ingredients for Success
To achieve the result shown in our visual blueprint, you need specific ingredients that prioritize both structural integrity and flavor. Using high-quality components ensures your tortellini salad looks as good as it tastes.
Cheese Tortellini: Look for 1 lb (450g) of high-quality refrigerated or frozen cheese tortellini. These typically have better “ridge definition” than dried versions, which is essential for catching the herb glaze.
Genoa Salami: You will need 4 oz (115g) of thinly sliced Genoa salami. The thinness is non-negotiable, as it allows you to fold the slices into elegant, marbled ribbons that add vertical height to the dish.
Fresh Mozzarella Pearls (Ciliegine): Use 8 oz (225g) of “pearl” sized mozzarella. These snow-white spheres provide a creamy visual break from the vibrant reds and greens of the vegetables.
Cherry Tomatoes: Select 1 cup (150g) of taut, firm cherry tomatoes. Halving them longitudinally reveals their juicy interior while maintaining a structured “snap” when bitten.
Flat-Leaf Parsley: A 1/2 cup (15g) of finely minced parsley is used as a “shower” over the final dish. It adds a clean, peppery finish and a professional herbaceous aroma.
Red Onion: Half of a small red onion, cut into paper-thin slivers. These provide sharp acidity and a purple hue that pops against the terracotta bowl.
The Glossy Vinaigrette Base: You will need 1/2 cup (120ml) extra virgin olive oil, 3 tbsp (45ml) red wine vinegar, 1 tsp (5g) Dijon mustard, and 1 tsp (5g) honey. The mustard and honey are the “invisible” emulsifiers that create that signature glistening sheen.
Essential Equipment for a Gourmet Plating
To recreate the high-end handheld smartphone photo look, you don’t need a commercial kitchen, but you do need the right tools for precision prep. A large stockpot is required to boil the pasta in a high volume of salted water, preventing the starch from making the tortellini sticky.
A sharp mandoline or a very high-quality chef’s knife is essential for achieving those “thin slivers” of red onion. For the dressing, a small glass jar or a high-speed whisk is necessary to emulsify the oil and vinegar into a stable glaze that won’t pool.
Finally, a shallow matte terracotta or ceramic bowl is the best vessel for presentation. The wide surface area allows you to layer the ingredients vertically, ensuring the salami ribbons and mozzarella pearls aren’t buried at the bottom.
Step-by-Step Instructions for the Perfect Assembly
1. Achieving the Perfect Al Dente Tortellini
Bring 4 quarts (3.8L) of heavily salted water to a rolling boil. Drop the cheese tortellini in and cook for exactly 1-2 minutes less than the package directions. You are looking for a firm, “ridged” texture; the pasta should be pliable but offer a distinct resistance when bitten.
Immediately drain the pasta and rinse with cold water for 30 seconds to stop the cooking process. Shake off all excess moisture. While still slightly warm, toss with 1 tsp (5ml) of olive oil to prevent sticking and preserve the smooth surface of the dough.
2. Crafting the Emulsified Herb Glaze
In a small bowl, combine the red wine vinegar, Dijon mustard, honey, and a pinch of salt. Slowly stream in the extra virgin olive oil while whisking vigorously. The mixture should transform from a separated liquid into a thick, pale, and glossy vinaigrette.
Fold in half of your minced flat-leaf parsley and a generous crack of black pepper. This allows the herbs to hydrate within the oil, releasing their aromatics more effectively into the tortellini salad.
3. Folding the Salami Ribbons and Prepping Aromatics
Take each thin slice of Genoa salami and fold it into quarters or “S” shapes. This creates a ribbon-like appearance that looks far more sophisticated than flat slices. Set these aside so they don’t lose their shape during the initial mixing phase.
Slice your red onion into slivers so thin they are almost translucent. If the onion flavor is too sharp, soak the slivers in ice water for 5 minutes, then pat dry. Halve the cherry tomatoes and ensure the mozzarella pearls are drained of all packing liquid.
4. The Final Gourmet Assembly
In a large mixing bowl, combine the chilled tortellini, halved tomatoes, and mozzarella pearls. Drizzle three-quarters of the vinaigrette over the top. Use a large rubber spatula to gently fold the ingredients until every surface has a thin, glistening sheen.
Transfer the mixture to your shallow terracotta bowl. Carefully tuck the salami ribbons into the crevices between the pasta. Scatter the red onion slivers and the remaining parsley over the top. Finish with a final, aggressive shower of coarse cracked black pepper.
Expert Tips for Culinary Success
- The “Warm Toss” Rule: Tossing the pasta in a small amount of dressing while it’s still slightly warm allows the flavor to penetrate the dough, while the final “glaze” provides the visual sheen.
- Emulsion Stability: If your dressing separates, add another half-teaspoon of Dijon mustard. It acts as a bridge between the oil and vinegar.
- Avoid the Pool: Never pour all the dressing at once. Start with less than you think you need; you want a “sheen,” not a “soup.”
- Salami Integrity: Add the salami at the very end. If you toss it too vigorously, the fat can render slightly or the ribbons can unfurl, ruining the visual “folded” effect.
Storage and Make-Ahead Advice
This tortellini salad is an excellent candidate for meal prep. It can be stored in an airtight container in the refrigerator for up to 3 days. However, for the best visual results, store the dressing and the fresh parsley separately.
The pasta will naturally absorb some of the vinaigrette over time. If the salad looks “dry” on day two, simply toss it with an extra teaspoon of olive oil and a splash of red wine vinegar to restore that signature glossy highlight.
What to Serve With This Tortellini Salad
This dish is a powerhouse on its own, but it also pairs beautifully as part of a larger Italian spread. If you are looking for more pasta-based inspiration, consider serving this alongside our Italian grinder tortellini salad for a meatier variation.
For a lighter, garden-focused meal, it complements a creamy tortellini broccoli salad or a fresh summer corn salad. If you’re hosting a large gathering, adding a classic pasta salad recipe to the table ensures there is something for every palate.
Frequently Asked Questions
While you can, refrigerated or frozen tortellini are recommended for this recipe because they hold their ridged shape better and have a superior, toothsome texture when served cold.
Use a large volume of water and do not over-crowd the pot. Cook one minute less than the package instructions and rinse immediately with cold water to stop the cooking process and firm up the starch.
Genoa salami is preferred because it is softer and more pliable, making it much easier to fold into the decorative ribbons required for the gourmet visual blueprint.
The secret is emulsification. By using Dijon mustard and honey as binding agents and whisking the oil in slowly, you create a thick glaze that clings to the pasta instead of sliding off.
Pasta naturally absorbs liquid as it sits. To refresh, whisk a teaspoon of olive oil with a splash of red wine vinegar and toss gently to restore the glossy sheen.
The Ultimate Italian Tortellini Salad Recipe
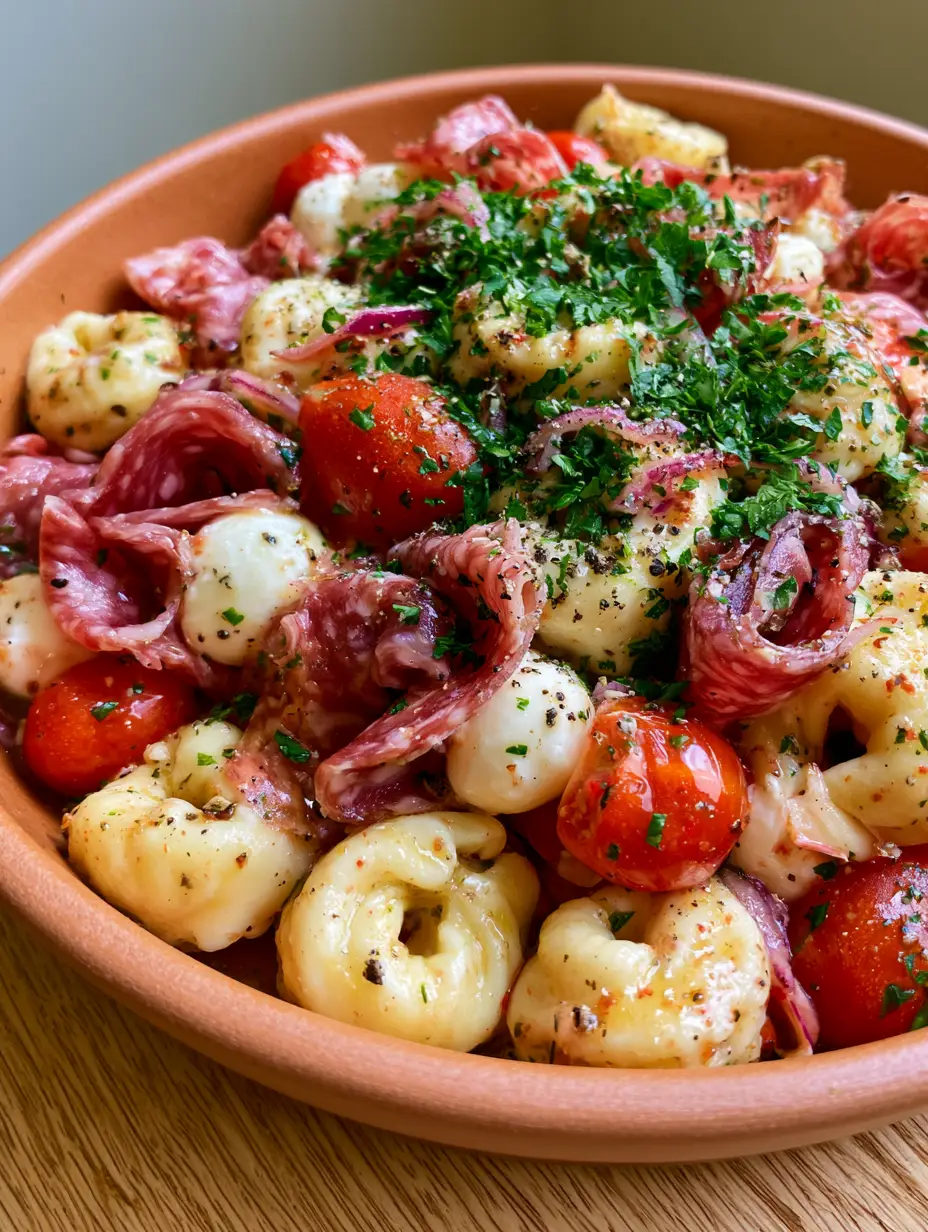
Tortellini Salad with Genoa Salami and Herb Vinaigrette
Ingredients
Equipment
Method
- Cook tortellini in salted water for 1-2 minutes less than package directions until al dente with distinct ridges.
- Drain and rinse with cold water. Toss with 1 tsp olive oil to prevent sticking.
- Combine vinegar, mustard, and honey. Slowly whisk in olive oil until a thick, glossy glaze forms.
- Fold tortellini, tomatoes, and mozzarella with the vinaigrette until glistening.
- Top with folded salami ribbons, onion slivers, parsley, and coarse black pepper in a terracotta bowl.
Notes
Tip 2. Fold salami slices into ribbons just before serving to maintain vertical height.
Closing & Call to Action
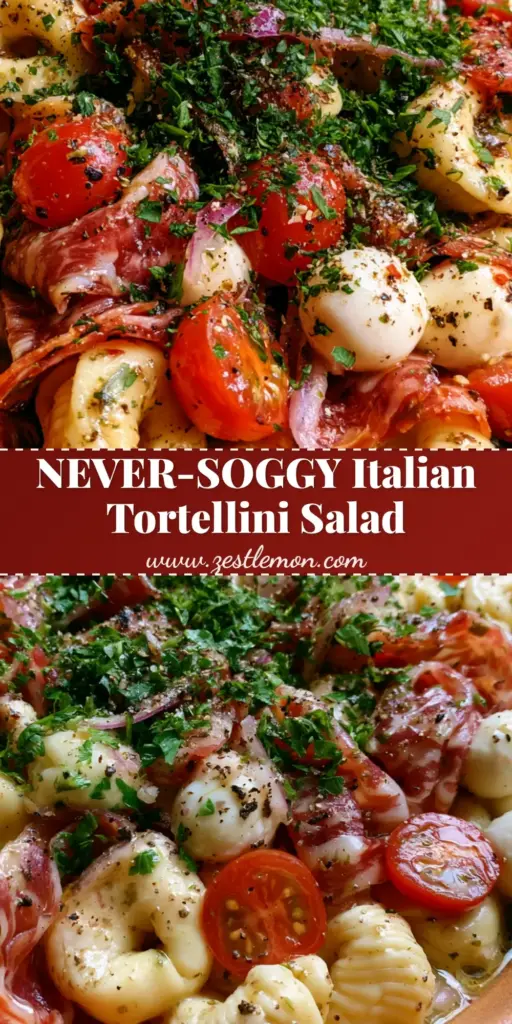
Mastering the tortellini salad is all about respecting the textures of your ingredients. By focusing on the al dente ridges of the pasta and the emulsified gloss of the vinaigrette, you create a dish that is as visually stunning as it is delicious.
If you enjoyed this recipe, please leave a comment below and let us know how your salami ribbons turned out! Don’t forget to follow us on Pinterest for more gourmet inspiration. Pin this recipe to your “Summer Salads” board to keep it handy for your next potluck!